Posts

Showing posts from February, 2018

Eclipson Model-Y - 04

Image
Eclipson Model-Y - 04 Printing Attempt 04 Feedback from Facebook indicated I should disable the "combing mode" because it disabled retraction. Profile:  Fine Layer Height:  0.2 Wall Thickness:  0.4 Top/Bottom Thickness:  0 Infill Density:  0 Enable Retraction:  Checked Retraction Distance:  6mm Retraction Extra Primer Amount:  0 Combing Mode: Off At 11% no major issues At 87% no issues. Print completed in a bit over 5 hours Minor issue found with the support tab on the trailing edge. The surface is not "tight". Lack of "tightness" more noticeable here. No stringing on the build bed of the wing. Oposite side we had adhesion problems when the wing wall thickness changed. This is intended to allow the outer wing sections to connect. Conclusion is while the wing did complete printing with minor issues. layer adhesion issues were significant on the top side of the print. Will have to change p

Eclipson Model-Y - 01 to 03

Image
Eclipson Model-Y 01 to 03 Downloaded the Wing_C.stl Print attempt 01 Loaded Cura 3.2.1 using the standard settings for the CR-10 Modified the following settings: Profile: Fine Layer Height: 0.2 Wall Thickness: 0.4 Top/Bottom Thickness: 0 Infill Density: 0 Enable Retraction:  Checked Retraction Distance: 5mm Saved file to SD Leveled bed CR-10 Put painter tape on CR-10 Used Glue-Stick on print area Started the print the normal way. Monitored the first layers closely to ensure there were no issues. Noticed some minor imperfections on the trailing side but didn't think they were important. Significant issues started to appear 50mm up. the stringing on was very significant on a a nozzle travel path.  This problem was to important to ignore and I stoped the print. Closer examination of the part and the Cura layer view confirmed that the stringing happened on the nozzle travel path. Further examination of the part revealed

CR-10S - First print (after one failed print)

Image
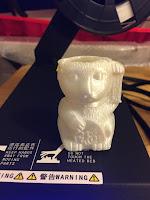
First Print As our first print we attempted to print directly from the cat.gcode file found in the Crealty SD card. Unfortunately that print failed at just under 90%. Apparently the print got unglued from the bed and got knocked over. I'm told this is not the corrupted g-code found in some Crealty SD cards. Since I wasn't sure about this "corrupted g-code" issue. I decided to create my own g-code out of the cat.stl file found in the same SD card.  I loaded the STL file into Cura 3.2, used the standard CR-10 profile in Cura. I specified no-infill and a build plate adhesion. The layer height was automatically set to 0.15. A little over two hours later I finally get a perfect print. Comparing with the original Crealty g-code our print looks more or less the same. The quality is the same. The first print failed because the part did not stayed glued to the bed We are very happy now!

CR-10S - Extruder troubles

Image
Extruder trouble The simple 30-minute build of the CR-10S had turned into a multi-day event. We have resolved several unexpected issues: Couldn't screw the gantry to the table because the wholes didn't align. Solution: Move the x-axis in the gantry all the way to the top. Then attempt to screw it. Stripping the treads in the z-coupler. Solution: use a bigger screw. X-axis not leveled. Unable to "Auto-Home". Solution: find the way to adjust the x-axis angle with respect to the z-axis. At this moment we felt ready to attempt our first print. Loaded the extruder tube with filament. Pushed some of it in and it came out melted as a 0.4 millimeter hot plastic noodle. All ready to go. Pick our first print from the SD-Card and go for it. NOTHING. The nozzle head moved around but no filament was coming out. Nothing. The extruder seemed to move but not knowing how it was supposed to move I was at a loss. More internet searches and questions asked. Final

CR-10S - Leveling the X-Axis

Image
X-Axis issues My YouTube beginners guide indicated I have to "auto-home" the CR-10. Fine except that my fully assembled CR-10S would refuse to auto-home. The X-axis would zero, the Y-axis would zero but the Z-axis would not go down enough to activate the Z-Axis limit. The z-axis motors would continue to turn but the gantry would not move. The z-axis couplers would disengage. So frustrating. To make matters worse I could get the gantry to trigger the z-axis limiter if I pushed the x-axis down on the side of the z-limiter microswitch but then the x-axis would spring back up. There didn't seem to be an intuitive way to adjust the thing. Frustrated I posted this to the  Creality CR-10 3d Printer User Group : My x-axis seems lower on the right side than on the left (the side with the z-limit sensor) As a matter of fact i can press the left side ant it lowers but then springs back up. This cannot possibly be normal (i.e. I cannot auto-home it doesn't go down eno