CR-10S - Extruder troubles
Extruder trouble
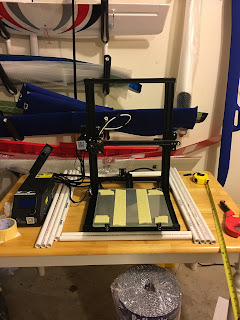
The simple 30-minute build of the CR-10S had turned into a multi-day event. We have resolved several unexpected issues:- Couldn't screw the gantry to the table because the wholes didn't align. Solution: Move the x-axis in the gantry all the way to the top. Then attempt to screw it.
- Stripping the treads in the z-coupler. Solution: use a bigger screw.
- X-axis not leveled. Unable to "Auto-Home". Solution: find the way to adjust the x-axis angle with respect to the z-axis.
At this moment we felt ready to attempt our first print. Loaded the extruder tube with filament. Pushed some of it in and it came out melted as a 0.4 millimeter hot plastic noodle. All ready to go. Pick our first print from the SD-Card and go for it.
NOTHING.
The nozzle head moved around but no filament was coming out. Nothing. The extruder seemed to move but not knowing how it was supposed to move I was at a loss.
More internet searches and questions asked.
Finally troubleshooted the problem to the extruder not working properly.
This is not the way the extruder is supposed to run. Suggestions to solve the problem ranged from cleaning the nozzle to replacing the CR-10S motherboard.
At this point I was about to give up.
In desperation I posted this to the Facebook group:
I’m about to return this printer.Immediately offers to help came out. The community behind this printer is remarkable. What can I say. I had no clue on how to even approach solving this problem. With their help this is what we did:😞 too many problems. X-axis wasn’t level, now extruder clicks even without any filament... the amount of of tinkering needed to get this going is borderline unacceptable
- Use the Prepare/Move Axis/Extruder function to move the extruder using the control panel.
- Confirm that the motor behaved the same way without filament.
- Exchange the extruder connector with the Y-axis motor to test if the Y-axis motor behaved in the same way as the Extruder motor. YES! It did the same thing.
- This meant the extruder motor was not busted. But either the motherboard was faulty, or if we got lucky, the connector insider the motherboard was not plugged all the way.
- We opened the control box. And unplugged and replugged the extruder connector in the motherboard.

- Opening the box and moving the power supply out of the way very straight forward.

- With the motherboard visible it was easy to identify the "Extruder 0" connector.
- Carefully we pulled the Extruder connector out and replugged.
- Retest
Problem solved!
Problems encountered and addressed:
- Couldn't screw the gantry to the table because the wholes didn't align. Solution: Move the x-axis in the gantry all the way to the top. Then attempt to screw it.
- Stripping the treads in the z-coupler. Solution: use a bigger screw.
- X-axis not leveled. Unable to "Auto-Home". Solution: find the way to adjust the x-axis angle with respect to the z-axis.
- Extruder didn't work properly. Solution: unplug the connector from the motherboard and reconnect.
We are now ready for the first print.


Comments
Post a Comment